
Compost for Beginners
If your lawns are mown, your beds weeded and your seedlings emerging what else is there to do? The answer is to start your own compost off. And with Councils in some areas no longer collecting garden waste this is the ideal time. You'll be surprised to find how easy it is to make your own peat free compost.
1. Your Compost Bin
First you need a compost bin. What this compost bin looks like depends on the space you have in your garden.
Large

If you have a large garden with a spare corner then you can build a compost heap rather than buying a container. This can be done using heat treated timber (so no nasty chemicals leach into your heap). Even old pallets will work - check the stamp to make sure they are safe. Nail whichever wood you use together into a box shape. Ensure that there are gaps so that air can circulate and you may want to wrap it in chicken wire to stop the contents escaping. Choose a site that is level and well-drained. This will allow excess water to drain away easily. This also helps worms to get in and break down the content - more of them later.
Medium

For smaller spaces those bins that look like a Daleks are readily available from either Garden Centres (phone them many are delivering at the moment) or your local Council. These are various shapes and sizes but all will do the job.
Small
If you don't have the room for a big bin or just don't generate that much waste then the Rollmix Composter is for you. This compact compost bin will fit in the smallest of space and is much more fun to turn than any other bin!
2. Use the Right stuff (and avoid the wrong stuff!)
So how do you make peat free compost? The key rule is to use an even amount of 'greens' and 'browns' by volume to create a balance. Add them in layers, watering as you go to keep the whole heap moist.
Greens
Vegetable peelings, grass clippings, fruit waste, teabags (if plastic free), dead bunches of flowers and plant prunings. These are fast to break down and provide important nitrogen as well as moisture.
Browns:
Include things such as straw, sticks. leaves, cardboard egg boxes, newspaper, crushed egg shells and scrunched up paper. These are slower to rot but provide vital fibre and carbon and also allow important air pockets to form in the mixture. Don't ever put meat or dairy products into your compost bin. Also avoid diseased plants, and perennial weeds (such as dandelions and thistle) or weeds with seed heads. There is a chance the temperature in your heap will get high enough to kill these off but it can not be guaranteed so best to avoid them. Also avoid any dog poo or cat litter as this will lead to pests and smells which no one wants!
3. Get the Balance Right
You need four main things:
- Greens
- Browns
- Air
- Water
The process works best when you get a good balance between the four things. If your compost is too wet, add more ‘browns’. If it’s too dry, add some ‘greens’. Add air by using scrunched up paper and also by turning your compost. It is a good idea to add a few handfuls of soil or a compost activator to encourage the correct enzymes in your compost.
To use the accelorator mix a small amount into water, pour it onto your compost. A well-cared-for compost heap requires regular turning, which can be a tricky job unless you are using a Rollmix composter in which case it is easy! See if for yourself here Rollmix Video.
If you aren't using Rollmix then turn with a fork or tip the compost out, mix and then put it back in the bin to boost to carry on maturing. Your compost should be ready in about 10 weeks. When it is ready you’ll have a dark brown, almost black soil-like layer at the bottom of your bin. It should have a spongy texture and will be rich in nutrients. Spreading the finished compost into your flowerbeds greatly improves soil quality by helping it retain moisture and suppressing weeds. It also reduces the need to use chemical fertilisers and pesticides. If you have any lumps like bits of stick that haven't decomposed yet in it, then an Easy Riddle is a simple way to get rid of them - check out this fun look at how it works Easy Riddle
4. Turn fallen leaves into compost too

You can add leaves to your compost heap but you may find you have too many to keep the green/ brown balance right. In this case you might prefer to place them in Composting Sacks. These large biodegradable bags can then be stored for a year or two. The resulting "Gardeners Gold" is a brilliant moisture-rich soil improver that’s great to use for potting mixes as an alternative to peat. The leaves will be kept neatly in one place and the sack will biodegrade, leaving you with a rich pile of wonderful compost.
See them in action over on our You Tube channel Compost Sack Video
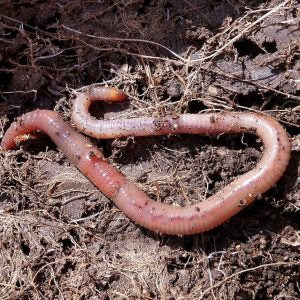
5. Let the worms do the hard work
Nature has provided us with the perfect waste disposal unit in the garden worm. Normally earthworms live in vertical burrows drawing leaves and other plant debris down. And they do exactly the same in your dark, moist compost heap - so there is nowhere they like better. Its like a worm buffet where they can eat the waste material you add and convert it into compost full of worm casts. Worm casts are small heaps of muddy soil ejected from the digestive tract of the worm They are excellent for plants adding all the essential nutrients that plants need into your compost. I do hope that this has helped and taken some of the mystery out of making compost. Let us know how you get on...