How to Grow Loofahs (or luffas!) from seed

What are Loofahs?
Many people don't realise that the Loofah you use to scrub your back or your dishes is actually a plant. And Good News! Unlike sea sponges, which are animals under threat due to habitat loss, loofahs are sustainable and can be grown. We won't lie to you they can be tricky but hopefully we can guide you through the maze.
 Loofah (Luffas or Loofas) are, in fact, large gourds that take quite a bit longer to grow than other gourds - around 100 to 150 days. If you don't want to wait until they are ready for bath time, young ones are delicious to eat. But if you want to grow them for washing with then you will need a lot of patience. Once the fruit is mature, it needs to be left on the vine for several weeks to dry and develop its tough inner fibres.
There are two species
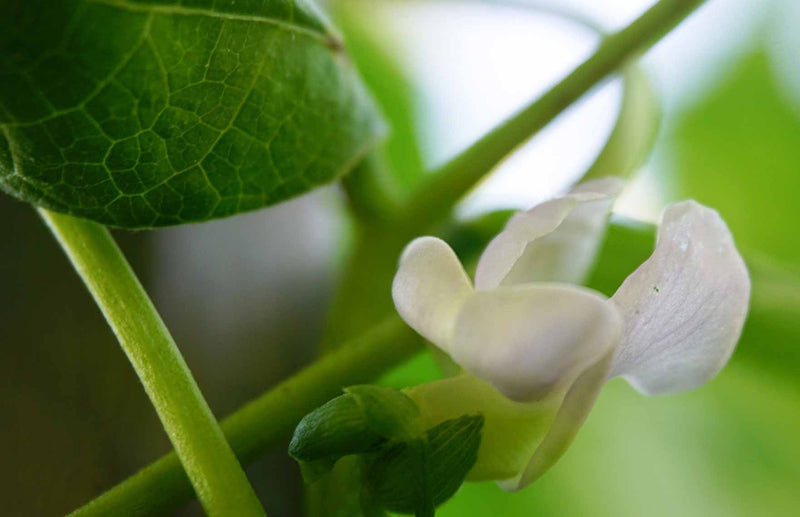
Luffa aegyptiaca - the angled or ridged loofah and
Luffa. acutangular or cyclindrica - the smooth loofah
The species are used pretty much interchangeably so either will work.
Sowing Loofahs
Loofah seeds are sown in mid April and require warm conditions to germinate. So you will need either a heated propagator, heat mat or a very warm windowsill. Whatever kit you have, sow quite a few more than you would for courgettes to ensure you get enough plants.To encourage germination, soak the seed for a few hours (minimum) in lukewarm water before you sow. Fill small pots with compost and plant the seed sideways about 1.5cm deep. Cover very gently with soil and water. Then place your pots in your propagator or on your heat mat or warm, sunny windowsill sealed in a plastic bag - you are aiming to maintain a temperature of around 25°C. Germination should take about a week at 25°C or up to a month at lower temperatures.
Try not to peek for a week as you will lower the temperature and allow moisture to escape. If your seeds have germinated then you are over the first hurdle. If they haven't appeared after a month there is a strong chance that the seeds have rotted rather than germinated. This happens if they don't get the warmth they need.
Potting on
Once the roots are starting to show through the holes at the base of the pot they can be potted on to a 5L Vigoroot pot or if you are using a conventional pot then at least a 10L size if not bigger.
If you are growing them outside or moving them from house to greenhouse then they will need a good week of hardening off as this is your second hurdle. Many loofah seedlings die of shock at this stage. So watch the weather and take it slowly to make sure they are prepared for the change in conditions. If there is any significant drop in temperature be prepared to cover them with a Victorian Bell Cloche or similar. The cold snap will likely slow growth for a while but if they are protected it should pick up along with temperatures.
Support
For their final growing position loofahs like full sun and a well-drained but moist soil, enriched with plenty of compost or well-rotted manure. Anything less than full sun and you won't get loofahs. The vigorous vines can grow to around 30 feet so they need lots of room to roam or a sturdy trellis, a chain link fence, Garden Maypole or cane wigwam to climb up. You could also try lengths of strong string strung down from the roof of the greenhouse or Sunbubble if you have one.
Growing
 Because of the long growing season they may need help with ripening. Get a good watering regime in place. Don't overwater and keep the compost moist but not saturated. As a guide they won't need as much water as courgettes. A good deep soak of the roots at the same time every morning should work well.
3 or 4 gourds per plant is about right so once you have this many at around 15-20cm long remove any other young fruits that form. Train in the new growth regularly so that you’re getting plenty of light and air to the fruits.
2 months before your first frost date pinch away all the flowers on the vine. The plant can then direct its energy to the existing fruits rather than producing new fruit that won't have time to mature.
Pest & Diseases
The leaves of loofah plants are a little prone to mildew - watering regularly in the morning will help to keep this at bay. If you do see any developing then remove affected leaves.
Aphids can also be a problem. Keep watching for them and remove by hand or if you are growing in a greenhouse then maybe release some ladybirds to deal with them for you.
Just like the seeds the loofah plants like the warmth. So ventilate the greenhouse if the weather is hot but watch out for cooler nights, and shut the greenhouse when temperatures fall.
Eating Loofahs
As you will only leave 3 or 4 fruits to reach maturity its an ideal opportunity to prune off the smaller fruit and eat it. The flower buds, flowers, and fruits can all be eaten. The fruits are great in stir fries and are similar to a summer squash in flavour.
When to harvest Loofahs
It will be around November before you are ready to harvest loofahs. If you can, leave the fruit on the vines and gradually they will change from green to yellow or brown and start feeling firm rather than spongy. Once they are firm you can harvest them. However it is important to pick your loofahs before frost hits even if they are still green. Whilst it is better to let them go yellow, green ones are fine but will just be a bit harder to peel.
Provcessing & Peeling Loofahs
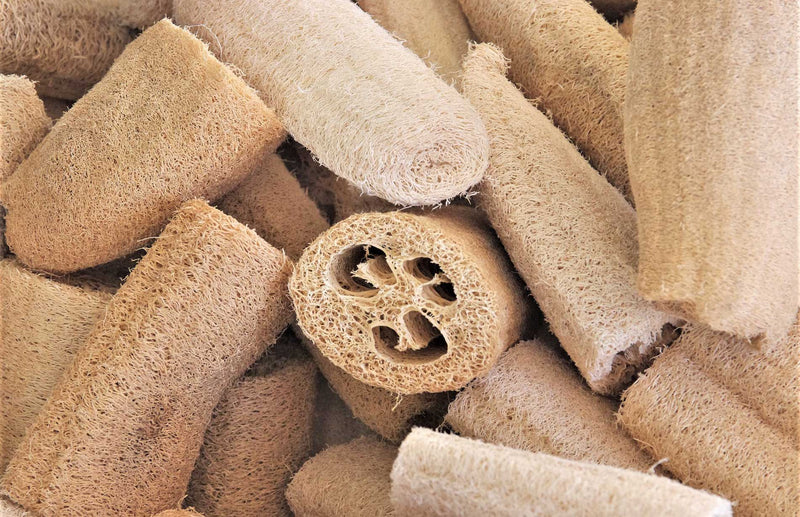
Cut off the fruit, then firmly massage the skin until you can feel it separating from the fibres inside. If you haven't loosened the skin then you may tear the fibres so keep massaging until you are sure that the skin is separated. Cut off the top and bottom few centimetres before getting your fingers under the skin. If its cracked then peel off any bits of skin then gently separate the rest from the fibres by moving your fingers between the two until the skin is loose. Now, rinse out the seeds and any remaining flesh with warm water - it should be looking like a loofah now!
To get the last few seeds out, put it into a sink of warm water and massage it again. As you do this it will become gradually more flexible and the seeds will come out. Leave to dry and it is ready for use! Don't forget to dry the loofah seeds on a paper towel and store for next year.
How to use your Loofah
 Once you have paraded your loofah on Social Media for all to wonder at (!) you can use it whole or cut into flat sections. Use it to wash you dishes, your body or your car in the knowledge that you have a) not used an 'at risk' sea sponge and b) have gone one step closer to 'plastic free' living.
Make sure you dry your loofah completely between uses to avoid dust accumulating and mould forming. If you feel it is getting a little musty then you can put it through the dishwasher or in the washing machine to clean it. After use it can, of course be thrown into the compost.
Please let us know how you get on!
More Posts
-
![Do I need to cover my Plants?]()

Do I need to cover my Plants?
A perennial question for gardeners is whether to cover their precious vegetable or fruit garden. It's a decision that can significantly impact the ...
Read More -
![The Ultimate Guide to Growing French Beans in Containers (Dwarf & Climbing)]()
The Ultimate Guide to Growing French Beans in Containers ...
French beans come in either dwarf or climbing varieties and are the perfect choice for small space growers to grow beans from seed on a balcony, pa...
Read More -
![How to Freeze Home Grown Rhubarb]()

How to Freeze Home Grown Rhubarb
If you are growing your own rhubarb then chances are you might get a glut. Luckily rhubarb is easy to freeze. Discover if you have to blanch rhub...
Read More


Comments
2 Comments
-

Posted by Haxnicks | November 17, 2021
-

Posted by Ruth | November 17, 2021
Leave a CommentHello Ruth
Loofahs are annual so it is unlikely you will be able to overwinter them. If you want to try you’ll need to keep it warm so try wrapping in agricultural fleece and putting in the greenhouse, shed or somewhere sheltered. Unfortunately many plants have been fooled into putting on growth by this warm autumn and will be killed off when the cold finally arrives! Keep us posted…
My loofah sat for months in a sheltered spot not doing very much.Now, since September, it started growing, still no flowers, but with night time temps due to drop next week, wondered if there’s anyway I can overwinter it to get a head start next year?